
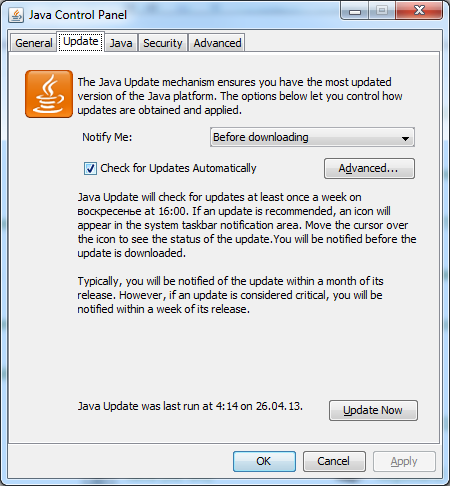
To disable Java updates I tried to make it in common way – I have opened Control panel, selected Java (32-bit), in tab “Update” checked off “Check for Updates Automatically” and pressed Ok. But when I opened it again, this value was again “On” (Drawing 1).
So I decided to see in Windows Registry.
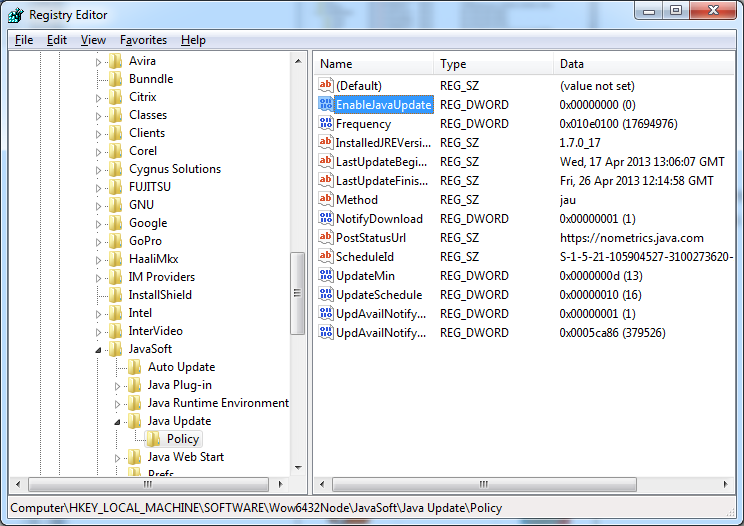
So open Registry Editor (push Win+R, enter Regedit and press Ok), go to Registry node “HKEY_LOCAL_MACHINE\SOFTWARE\Wow6432Node\JavaSoft\Java Update\Policy”, choose “EnableJavaUpdate” and set it value data to “0” (without quotes) (Drawing 2)
After these action there’s no more update option in Java. And no updates it makes. It saves traffic.
Leave a Reply